Writers Police Academy

FW: “Have you been fingerprinted?”

August, 2019 note: I had occasion to return to SIRCHIE during MurderCon, a  Writers’ Police Academy event. While the instructors were different, it’s reassuring to note that the science remains the same. Read on for details about gathering fingerprints from paper.


People ask me all the time how I acquire the information needed to write Kerrian’s Notebook.


Simple answer: research. And lots of it.


If the questioners want to know more, I mention the conferences I attend, the reference books I read, the internet sources I’ve tapped into, and the experts willing to chat about their chosen fields. It’s a fascinating part of the job and I love it.


The next few posts will reveal some of the information gathered at a series of classes where I took photos and lots of notes. If you’re a regular follower of Kerrian’s Notebook, you may recognize some of the details mentioned here as having appeared on previous Detective Kerrian’s pages.


For all out fun, I go to the Writers’ Police Academy held in September – this was the 5th year at the Guilford County, NC location (my fourth). It’s a three-day, mind-blowing experience that demonstrates the nuts and bolts of police and fire and EMS procedure – taught by professionals and experts actively working in the field.


Along with several other strands of study, the 2011 WPA conference provided classes in bloodstain patterns, fingerprinting, and alternate light sources (ALS) conducted by Sirchie instructors. Because of the standing room only enthusiasm for these classes, Sirchie offered a five-day Evidence Collection training session for writers at their own complex in North Carolina. Sirchie makes hundreds of products for the law enforcement community and I felt this would be a great opportunity for Detective Kerrian to learn more about the latest and best gadgets being used to catch the crooks.

 I happily sent in my application and plunked down my credit card to hold my space in the class – ten months ahead of time.


On the first day of classes, our instructor, Robert Skiff (Training Manager/Technical Training Specialist at Sirchie) discussed the ‘CSI Effect’ – the pressure placed by the popular TV shows on real life crime investigation. TV labs and real life investigations bear little resemblance to each other – not in time, or equipment, or budgets. Then we got to work, using the powders and brushes needed to process a crime scene and used by actual techs in the lab.

Fingerprint powders, brushes and magnifier

It’s up to investigators and examiners to prove the case against the suspects, using proper evidence collection techniques and tools, because trace evidence is ALWAYS left behind.


Fingerprints found at the scene are still the favored piece of evidence tying the suspect to the crime. These days, using a combination of ingenuity and newly developed chemicals and powders, a crime scene investigator can lift (and/or photograph) prints from many previously challenging surfaces. 


By the way, black fingerprint powder gets all over everything when newbies are handling it for the first time. We must have used 50 wet wipes each during the morning alone.


After dusting prints with black fingerprint powder,


they were lifted from various smooth surfaces using (in forefront) a gel lifter, a hinge lifter and (in background) tape.


We had to be careful not to contaminate the powders and jars or smear the samples themselves before looking at the prints under the magnifier. By the end of the day, most of us had black eyes and streaks on our hands and faces. It looks much easier on TV.


Our prints were photographed and then viewed under an Optical Comparator. This machine can be hooked up to a laptop, and the image sent off to AFIS for identification purposes. No crooks in our crowd, so we omitted that step.


At the end of the first day we left happy, tired, and still wiping powder off our hands and faces. A tip from an investigator taking the class with us: add a cup of vinegar to the wash load to get those powder stains out.


Did I mention that we had loads of fun?


On the second day, Robert Skiff’s assistant for the class, Chrissy Hunter, passed out stainless steel rectangles and we pressed our fingers onto the plates, twice. First time – plain ole print, second time – ‘enhanced’ by first rubbing our fingers on our necks and foreheads to increase the amount of oils in the print. The ridge detail in the prints was so clear in the ‘enhanced’ version that there was no need to process them with powder. We lifted them with a gel lift.


If we were working a real scene, that might never happen, but it could. The usual occurrence is that partial prints are left at the scene and that’s what makes the search for the suspects so much tougher than what the TV dramas indicate. There is no instant ‘a-ha’ moment that comes 45 minutes after the crime has been committed.


The prints are generally sent off to be compared with the millions in the AFIS database, and here’s where TV parts with reality again. AFIS comes back with a list of 10-20 possible matches and someone then makes a comparison by hand of the most likely hits.


After practicing the basics, it was time to move on to fingerprint discovery on documents. There are scheming relatives who forge wills, less than loving spouses who murder for the insurance, bogus suicide notes, and the list goes on. How to prove the nefarious intent? Fingerprints. But…as we discovered the first day, fingerprint powder is messy and almost impossible to clean up. An important document could be destroyed in the search for evidence of foul play. Enter chemicals and alternate light sources (ALS).

There is a protocol for testing with chemicals. If the prints don’t show up with one chemical, then it is possible to try several others, but this can only be done in a certain order:


Iodine

DFO

Ninhydrin

Silver Nitrate

MBD


If used in this order, the sample won’t be compromised, even though treated several times over several days. We experimented with several chemicals with excellent results, but for the ‘wow’ factor, I’m showing the ones that look great on camera.  😉

Spraying Document

 DFO reacts to amino acids in the prints. We created our samples placing our own enhanced prints on plain white paper. We hung the papers in the fume hood, saturated them with DFO, then put them in the oven to bake for several minutes.

This DFO sprayed, baked sample doesn’t look like much, so it was time to use an ALS to really ‘pop’ the print and make it photo ready.

Alternate Light Sources vary depending on the scene lighting and/or need to highlight the evidence. A few used in the field are: the ‘poor man’s ultimate light source’ (a mag light), black lights, UVC lights, lasers, LED lights, Ruvis lights (cost about $20K), and pure white lights. Each has a specific quality that the investigators can tap when needed.

After we sprayed our samples with DFO and baked them in the oven, we darkened the room, and put on orange plastic glasses. Then we side-lit the sample with a 455nm light. The photo was taken at that point.

Same sample, side-lit at a slightly different angle. Photo taken through an orange filter.


Ninhydrin, the third chemical group in the list to be used if nothing has shown up yet, comes in several forms: acetone, zylene and Noveck.  Ninhydrin reacts to another set of amino acids and likes warm, moist air. If a sample is being saved overnight for processing, you can place it in a ziplock bag, blow into it, then seal it and still maintain its integrity.


Before working with any chemical, it’s a good idea to make copies of the document. Why are there different kinds of Ninhydrin? Zylene will run some inks. Acetone will run all inks, all the time. Ooops! There goes the document if you grab the wrong chemical, so copies are definitely necessary. Noveck is the clear winner when working with inks. It gets fast results and dries quickly. Additionally, it can be sprayed on an outer envelope to reveal what’s inside. Without damaging either piece of paper. Very cool.

Ninhydrin-Noveck sprayed on outer envelope


You could see the plots developing in our writerly minds as the Noveck dried and the words inside the folder faded from view.


*Photos taken by Patti Phillips at the Sirchie Education and Training Center in Youngsville, North Carolina.


KN, p. 82 “Is that your footprint?”


It’s been raining off and on for days. It rained last week during a party, and people were tracking water and a little mud from the driveway runoff onto the porch all afternoon. We had so many different kinds of footprints that it would have made for a great crime scene demonstration.


Because, one of the most overlooked pieces of evidence at a crime scene is created by footwear.


Imagine: If a window breaks as a thief enters the premises during the commission of a burglary, the glass will fall into the house, and onto the floor or rug below the window. When the thief steps through the window, unless the thief has wings, he/she will probably plant a foot right in the middle of the glass. And walk through the house, most likely tracking minute pieces of that glass. That glass may also become embedded in the grooves of the sole of the shoe, creating a distinctive footprint.


If the investigating officer can place a suspect at the scene with the footprint, then there is probable cause to fingerprint that suspect and hopefully establish a link to the crime.


A new method of eliminating suspects right at the scene involves stepping into a tray that contains a pad soaked with harmless clear ink that doesn’t stain, then stepping onto a chemically treated impression card. No messy cleanup, immediate results, and it can even show details of wear and tear on the shoe. This can be a way to establish a known standard (we know where this impression came from) to compare with multiple tread prints at the scene.

Footwear Clear Ink Impression


Another tool for creating a known standard is the foam impression system. It takes a bit longer, (24 hours) but clear, crisp impressions can be made, including of the pebbles and bits stuck deep into the grooves and the writing on the arch. Very helpful when trying to place suspects at the scene. A rock stuck in the sole is a random characteristic that can’t be duplicated, so becomes another point of identification.


This is how it works: Somebody steps into a box of stiff-ish foam – a bit like stepping into wet sand.


An impression is made instantaneously. The detail is great – down to the wear on the heel.

Pre-mixed dental stone (made with distilled water and the powder) is used to fill the impression.

It takes 24 hours for the cast to become firm enough to pop out of the foam. We now have a permanent record of the footwear tread, which could be used for comparison to other prints found at the scene.

Footwear Casts


Occasionally footprints are found on the ground outside a window or in the gardens surrounding a house after a burglary or homicide. Ever see a crime show on TV where the fictional investigator makes a snap judgment about the height and weight of the owner of the footprint because of the depth of the impression? That’s merely a plot device and is not scientific evidence in real life. A crime scene photographer or investigator can photograph the footprint (next to a measurement scale), make a take away cast, and then compare the impression with those of the suspects or other bystanders at the scene. Beware: making a cast of the print destroys the print, so a photograph must be taken before pouring that first drop of dental stone.


Footprints can be found at bloody crime scenes as well. The suspect walks through the blood, tracks it through the house, cleans it up, but the prints are still there, even though not obvious to the naked eye. Blood just doesn’t go away, no matter how hard you try to get rid of it. It seeps into the cracks and crevices of a floor and even behind baseboards.


A savvy investigator will collect sections of carpet (or flooring) taken from where the suspect might have walked during the commission of the crime, then conduct a presumptive test for blood (LCV – Aqueous Leuco Crystal Violet), find a usable footprint, compare it to a known standard, and then be able to place the suspect at the scene.


Be careful where you walk. That footprint can be used as evidence.


*Photos taken by Patti Phillips


KN, p. 241 “SWAT Equipment and Strategies”


In “The Swat Team Experience,” I discussed the events that might cause a SWAT team to be called to active duty.


Take a look at some of the equipment/gear they might use during an active crime scene:

#1
#2                                                      #3


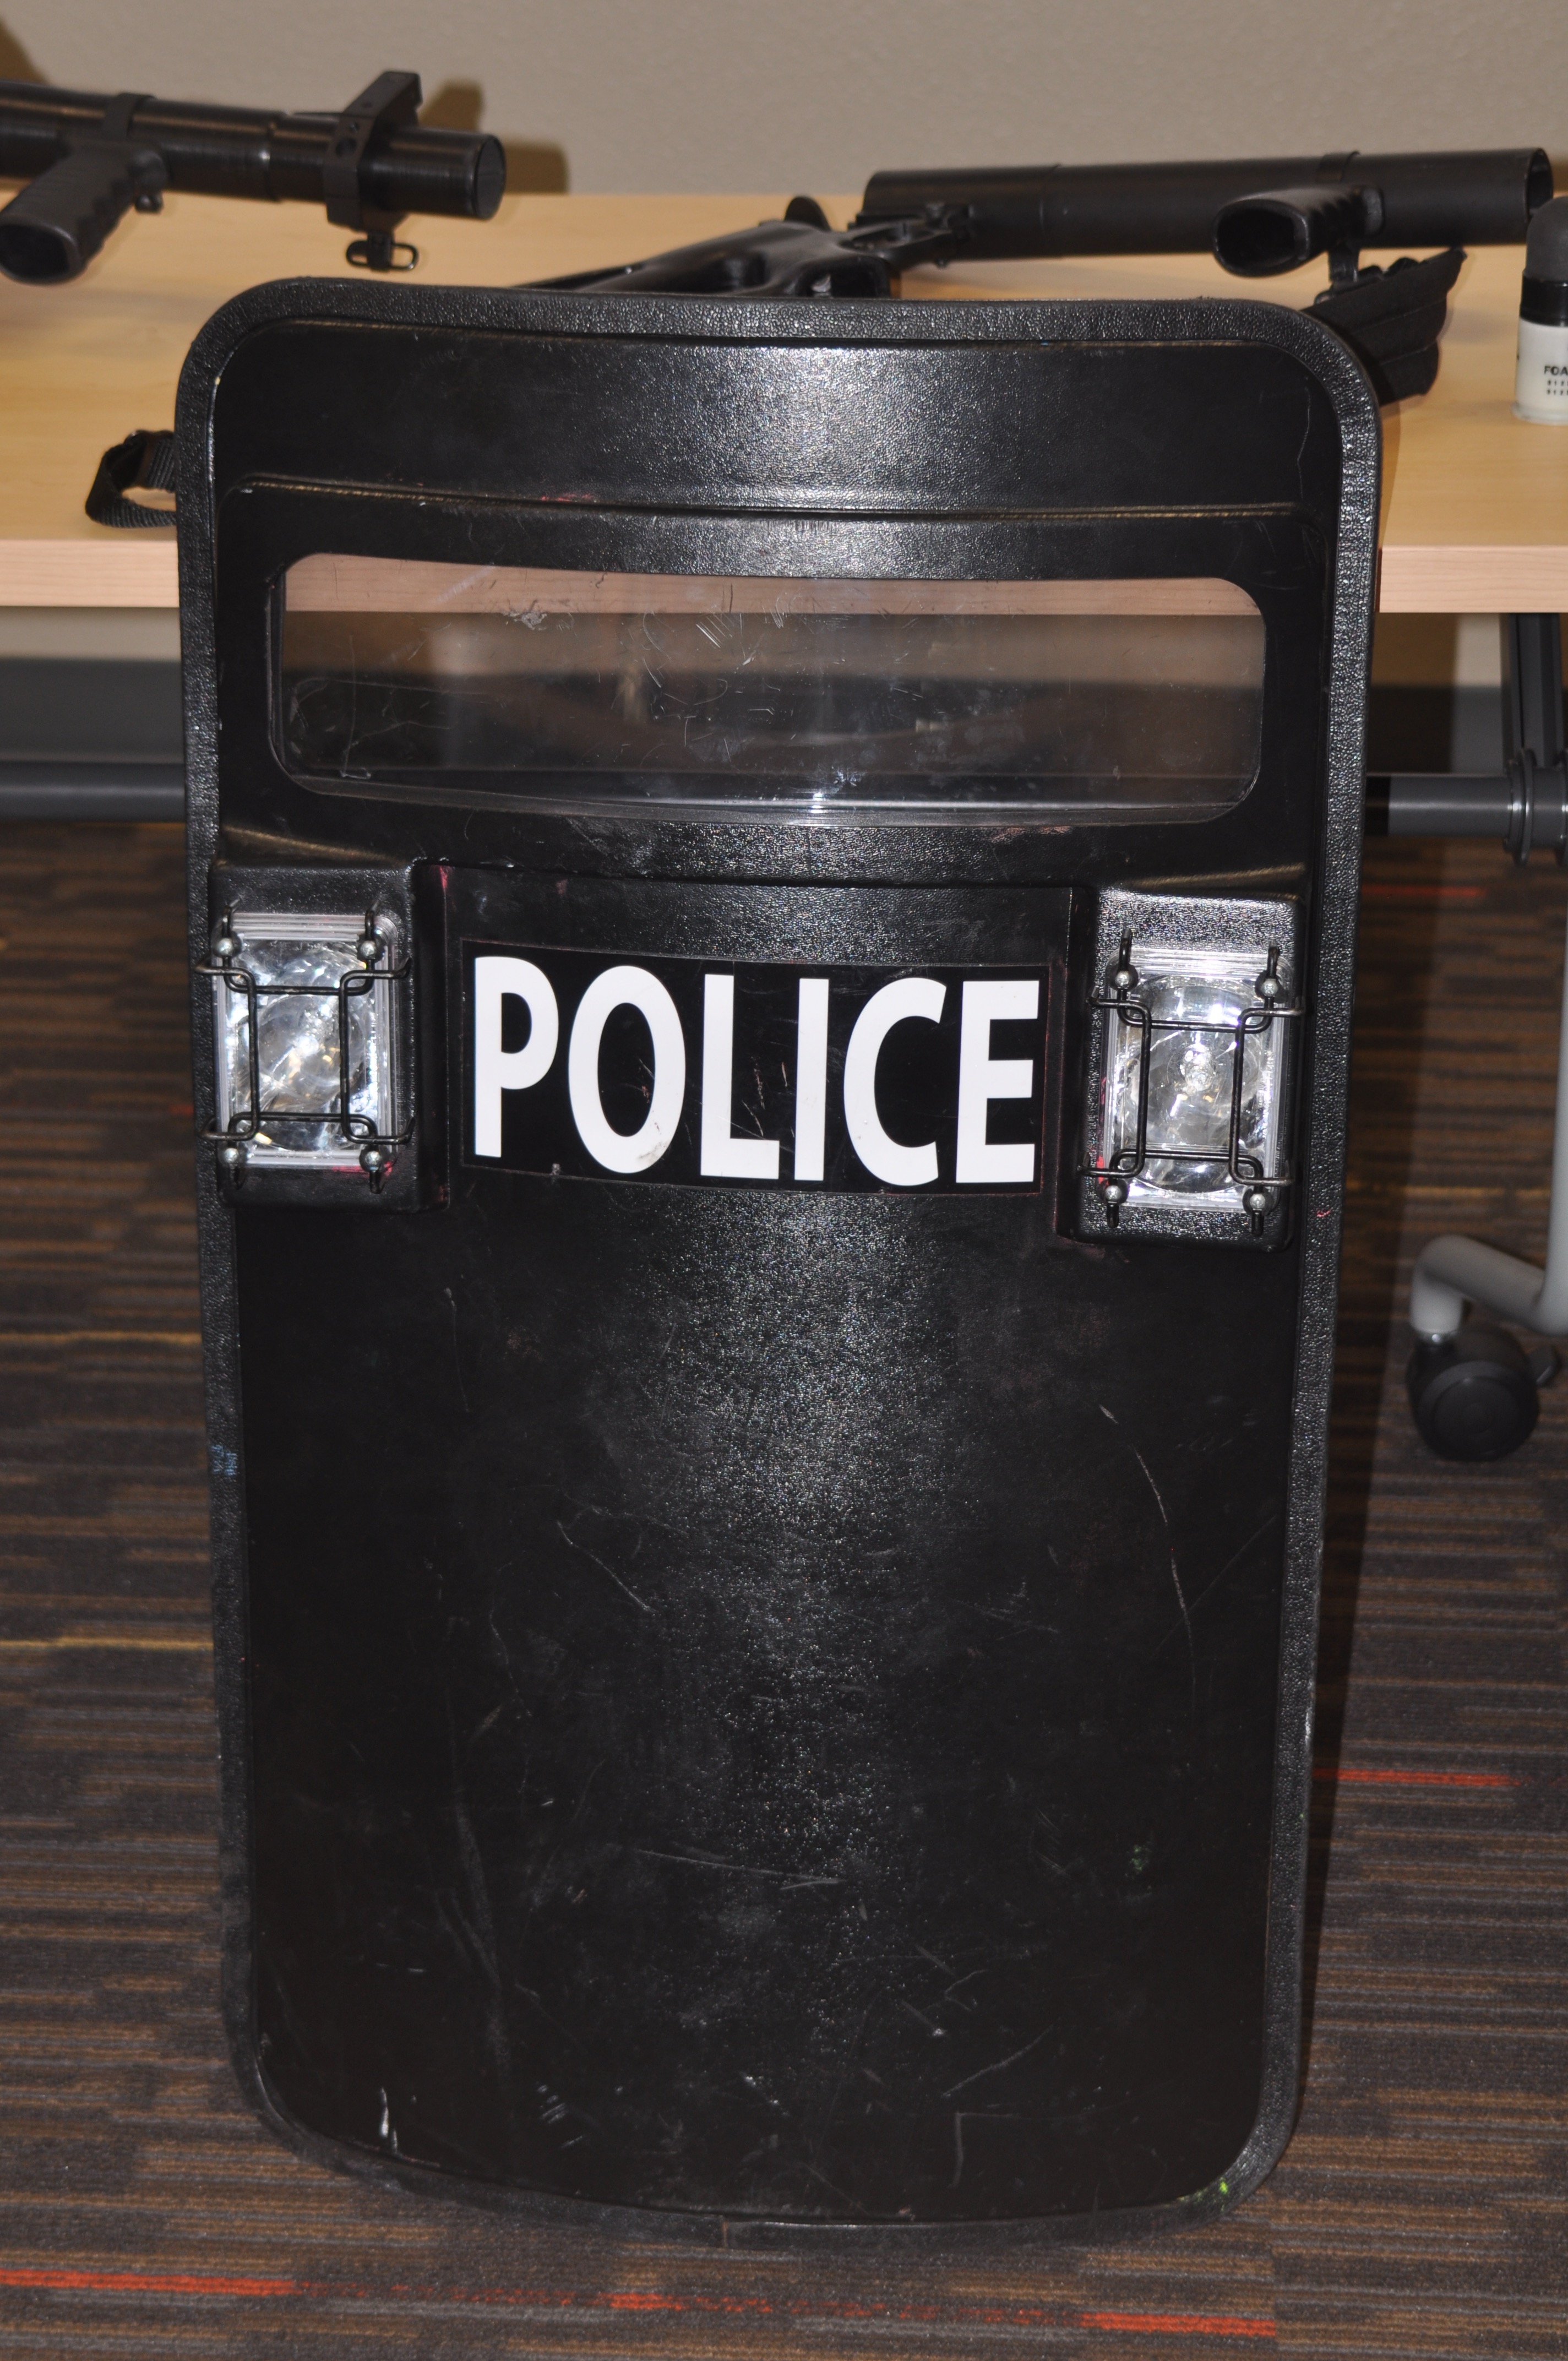
The ballistic shield on the left is larger and heavier, covering more of the body, and has an armored viewing port. The smaller, lighter weight shield (#2) is preferred by some officers because it allows for an easier reach around it with weaponry. It does cover a smaller part of the body’s core. See #3: Both versions have hand holds on the back and attachments for neck support.


The equipment might weigh 50-65 pounds when fully hooked up. Many team members carry

  • Medical kit
  • Ammo Clips
  • Notebook
  • Glock 22
  • Nomex fire retardant gloves
  • Ballistic goggles
  • Ballistic helmet
  • Gas mask


They wear cargo pants because of the fit and all the practical pockets. Some tactical grade cargo pants have extra lining, allowing the officers to carry additional magazines (ammo), and are made of rip stop fabric. They are similar in weight and texture to several camping cargo pants I have from LLBean. They breathe well and allow sweat to wick away, but mine aren’t tough enough to hold ammo.


A sniper has to be prepared to observe and report the event as it unfolds, so they choose a spot within 50-75 yards of the scene that is good for watching, as well as shooting in case that has to happen. In order to communicate their intel, they use an encrypted digital signal that can’t be picked up on scanners, but can be heard by other members of the team. SWAT team snipers generally work in pairs, rotating positions every 15-30 minutes. Snipers want to be on the same plane as the target(s). The more off a 90 degree angle they are, the more off a straight line the shot will go after it hits glass, etc. that might be between the shooter and the target.


One of the tricky, but essential, parts in gathering information is to find is where in the house or building the target is. The agencies involved identify positions around the house for ease of information sharing, using letters or numbers. i.e.: “I’m at Position A, ten yards out.”


                                      C

                                Back of house

B                                                                          D   

                                      A


Or, using positions on a clock, an officer might say, “I’m at 12:00, twenty yards out.”


A SWAT team is not the bomb squad, although they are able to call upon a bomb expert if needed. In general, no robots are sent in to surveil the area, because the bad guy could pick the robot up and put it in a closet.


The scary part of breaching a building is not knowing what’s on the other side of the door. The teams get very quiet before entrance, but the ride after the mission can be very loud as they burn off the high intensity of the operation. The job does take a toll.


What is used to force out the bad guys?


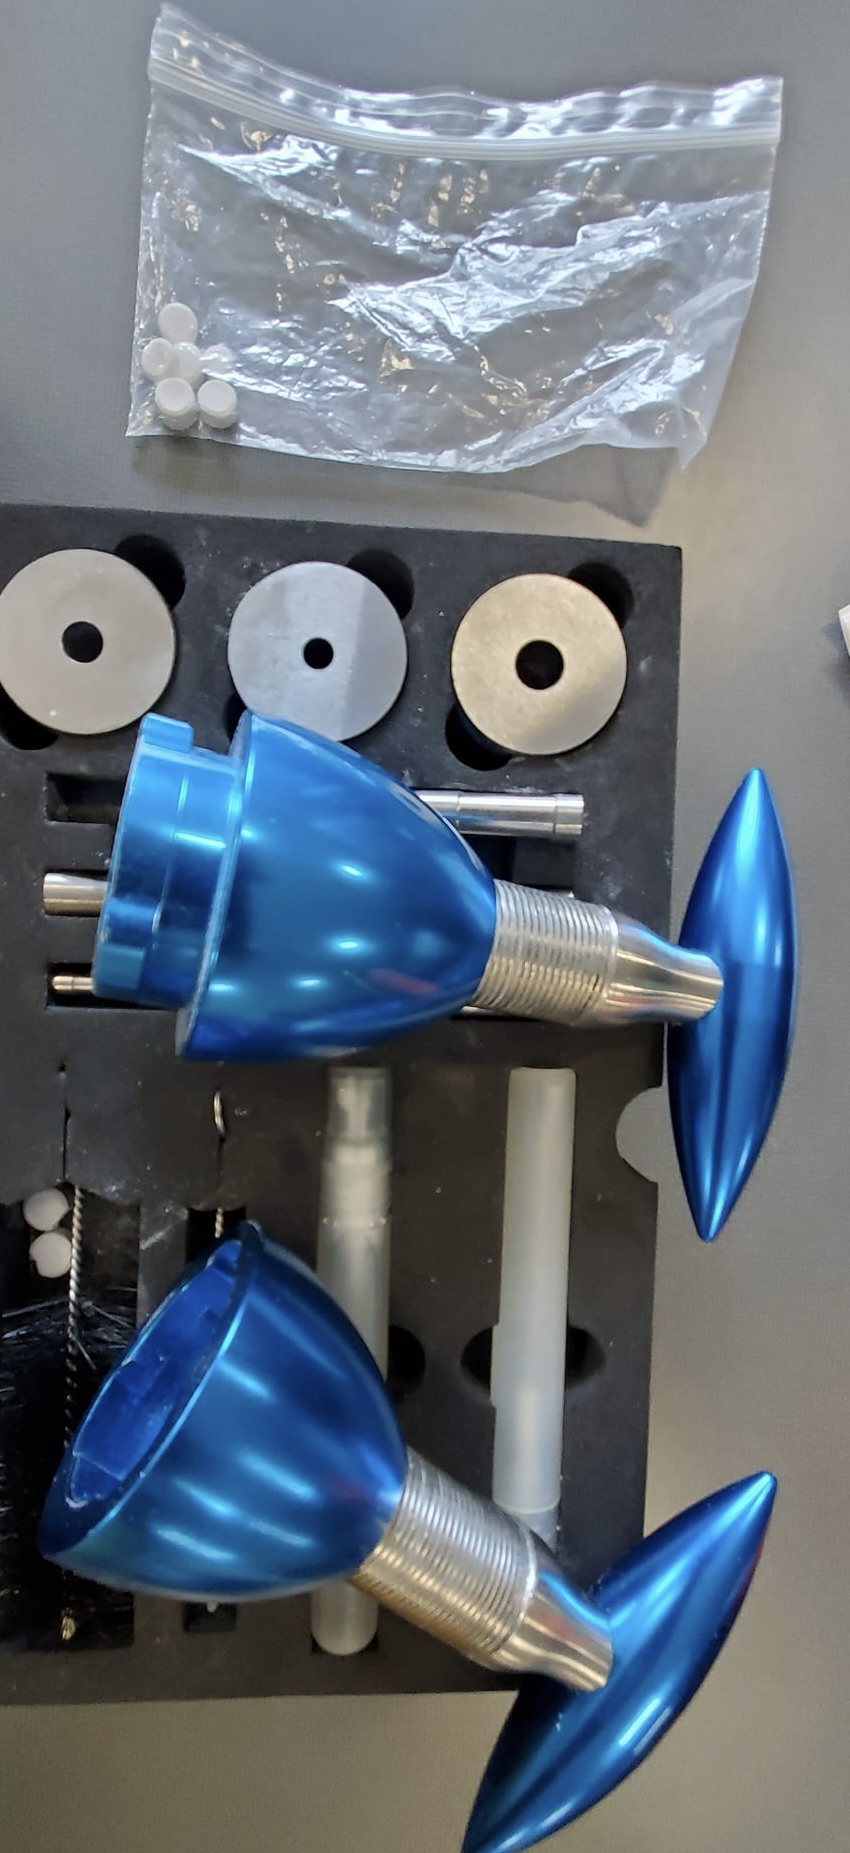
Flash-bangs (stun grenades) are one tool, called that because of the blinding flash and ear-splitting bang meant to only temporarily blind and deafen, therefore disorienting the target. The goal is not to kill the suspects, just to flush them out into the open. Teams try not to use this in domestic situations because of the potential collateral damage.


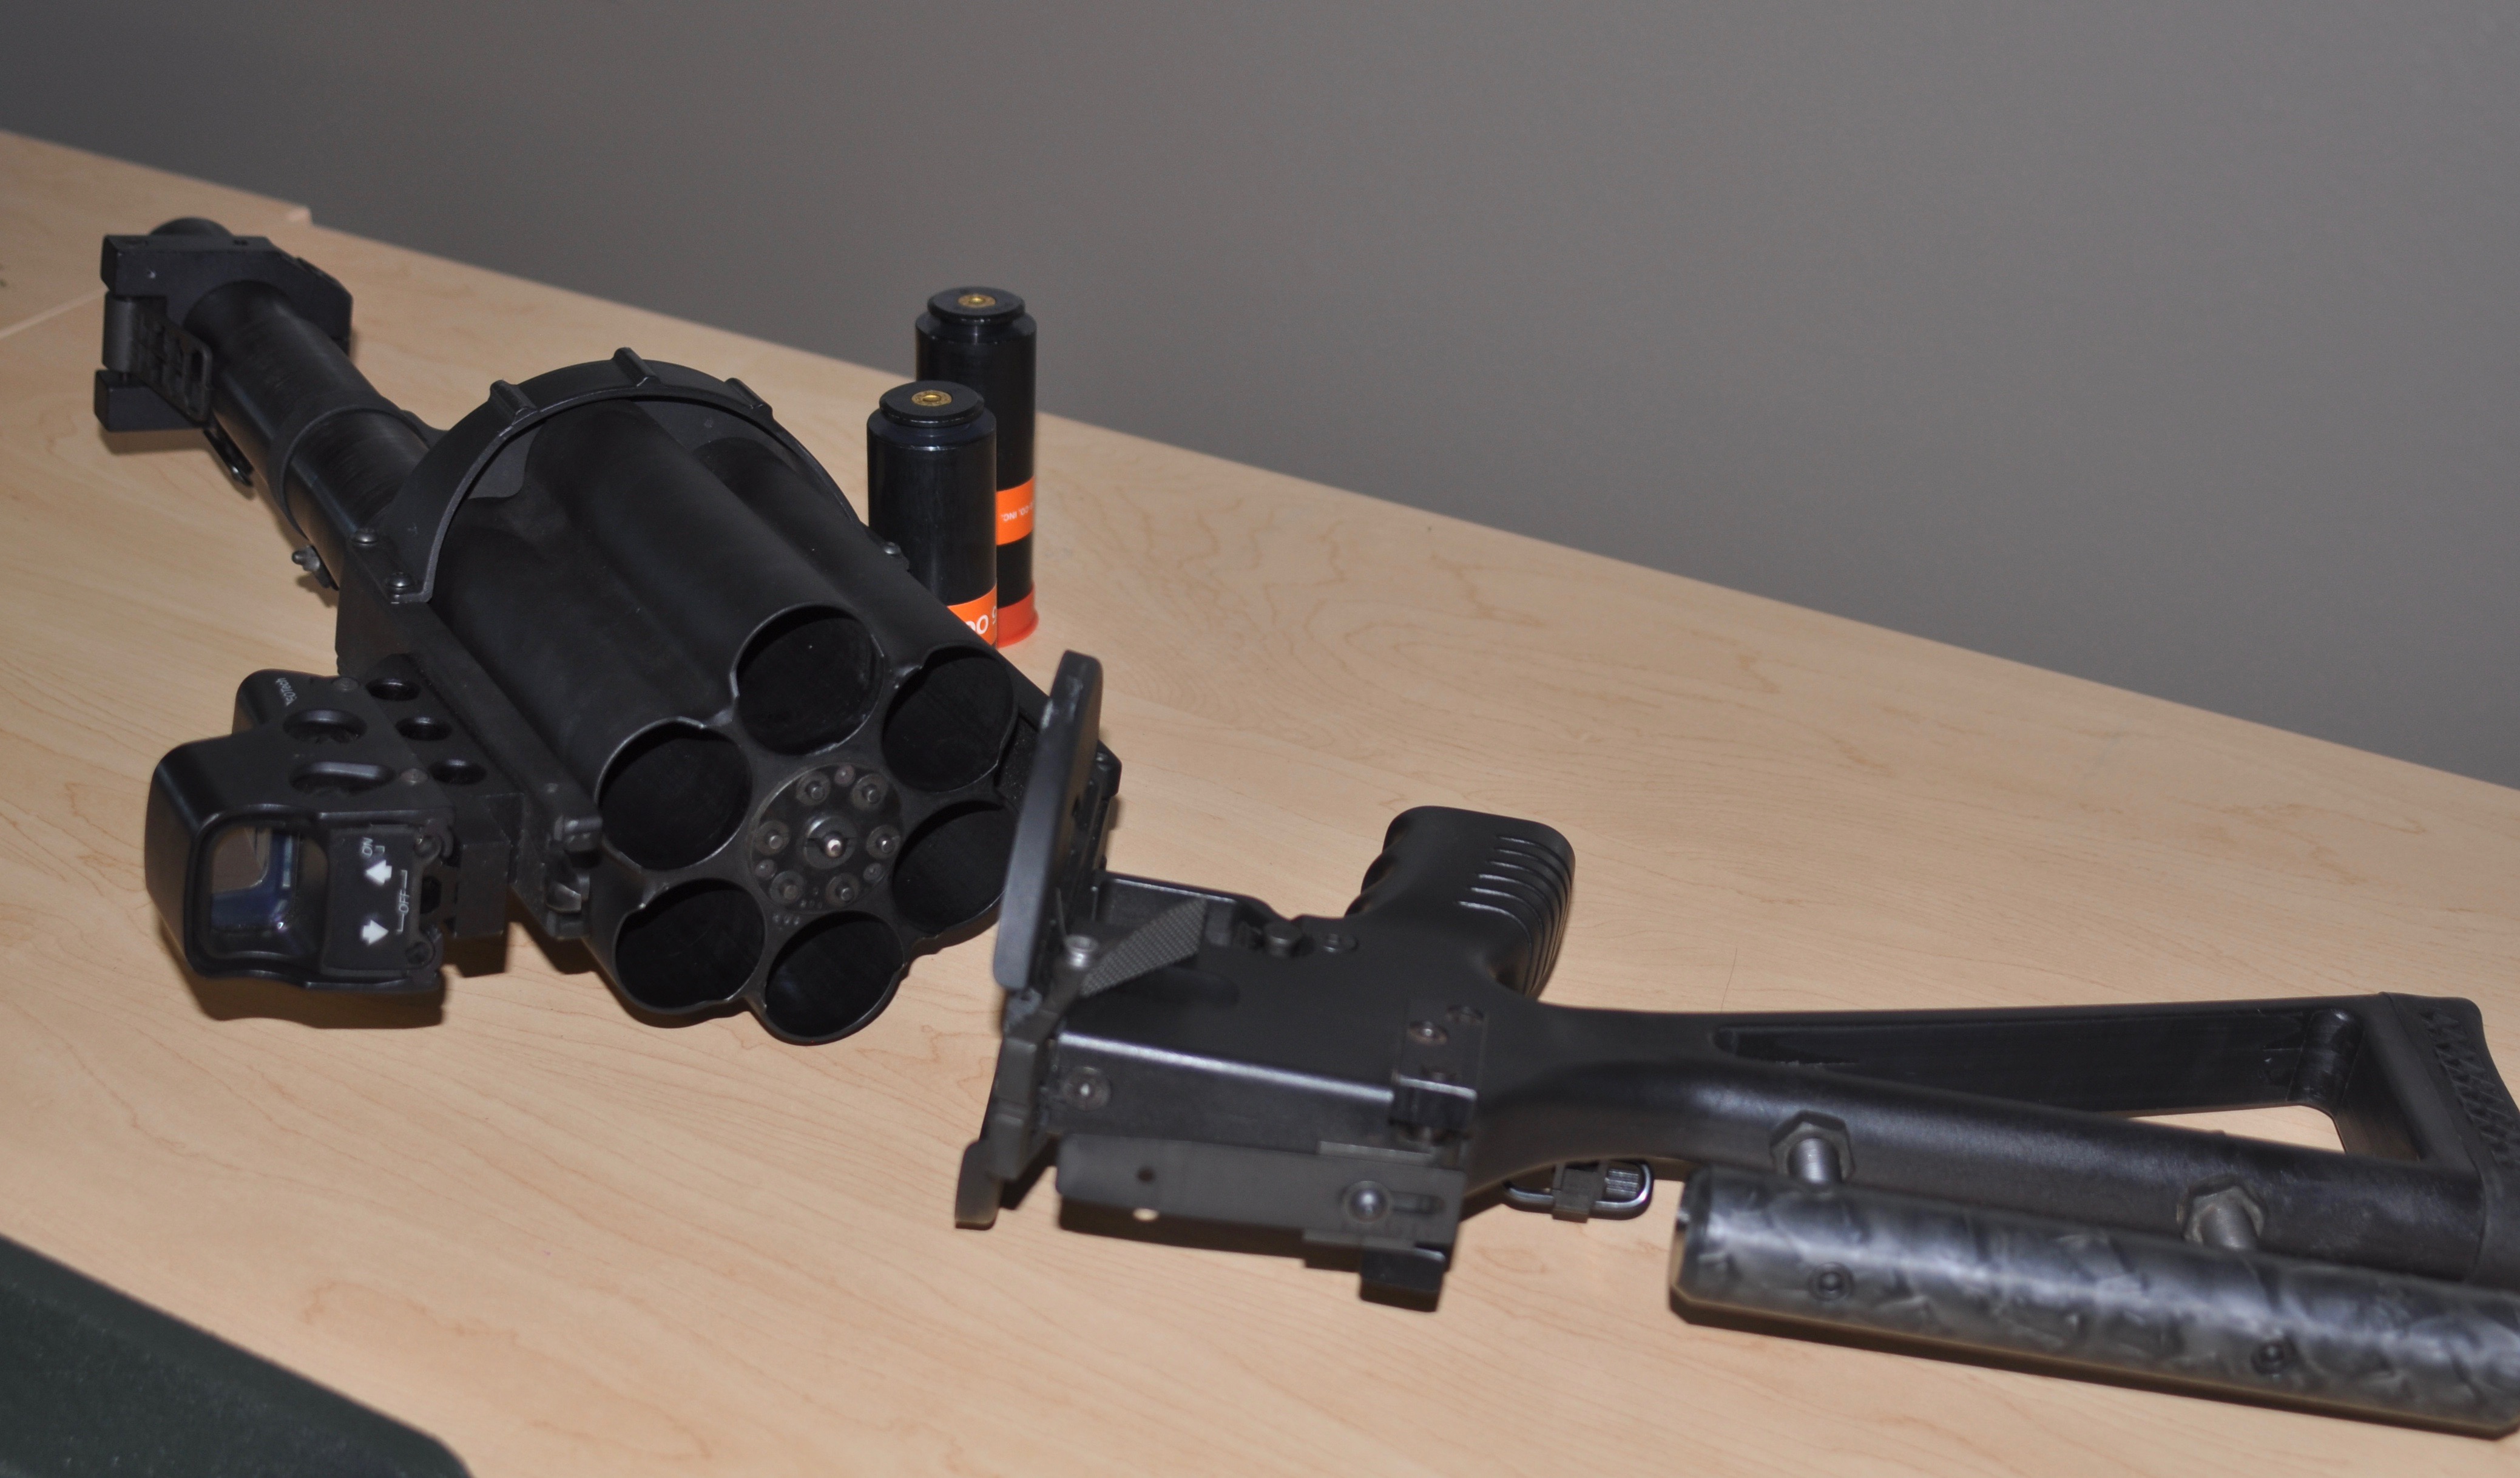
Gas grenades: The s-6 multi-launcher gas rounds can cause pain in the face and eyes. FYI, the gas gets into the clothes of everyone in close proximity and lasts for more than 24 hours, even in the wash.


Remington Ball Camera:  This can be tossed into the house, where it will land and take photos in a 360 degree arc. It also records sound.


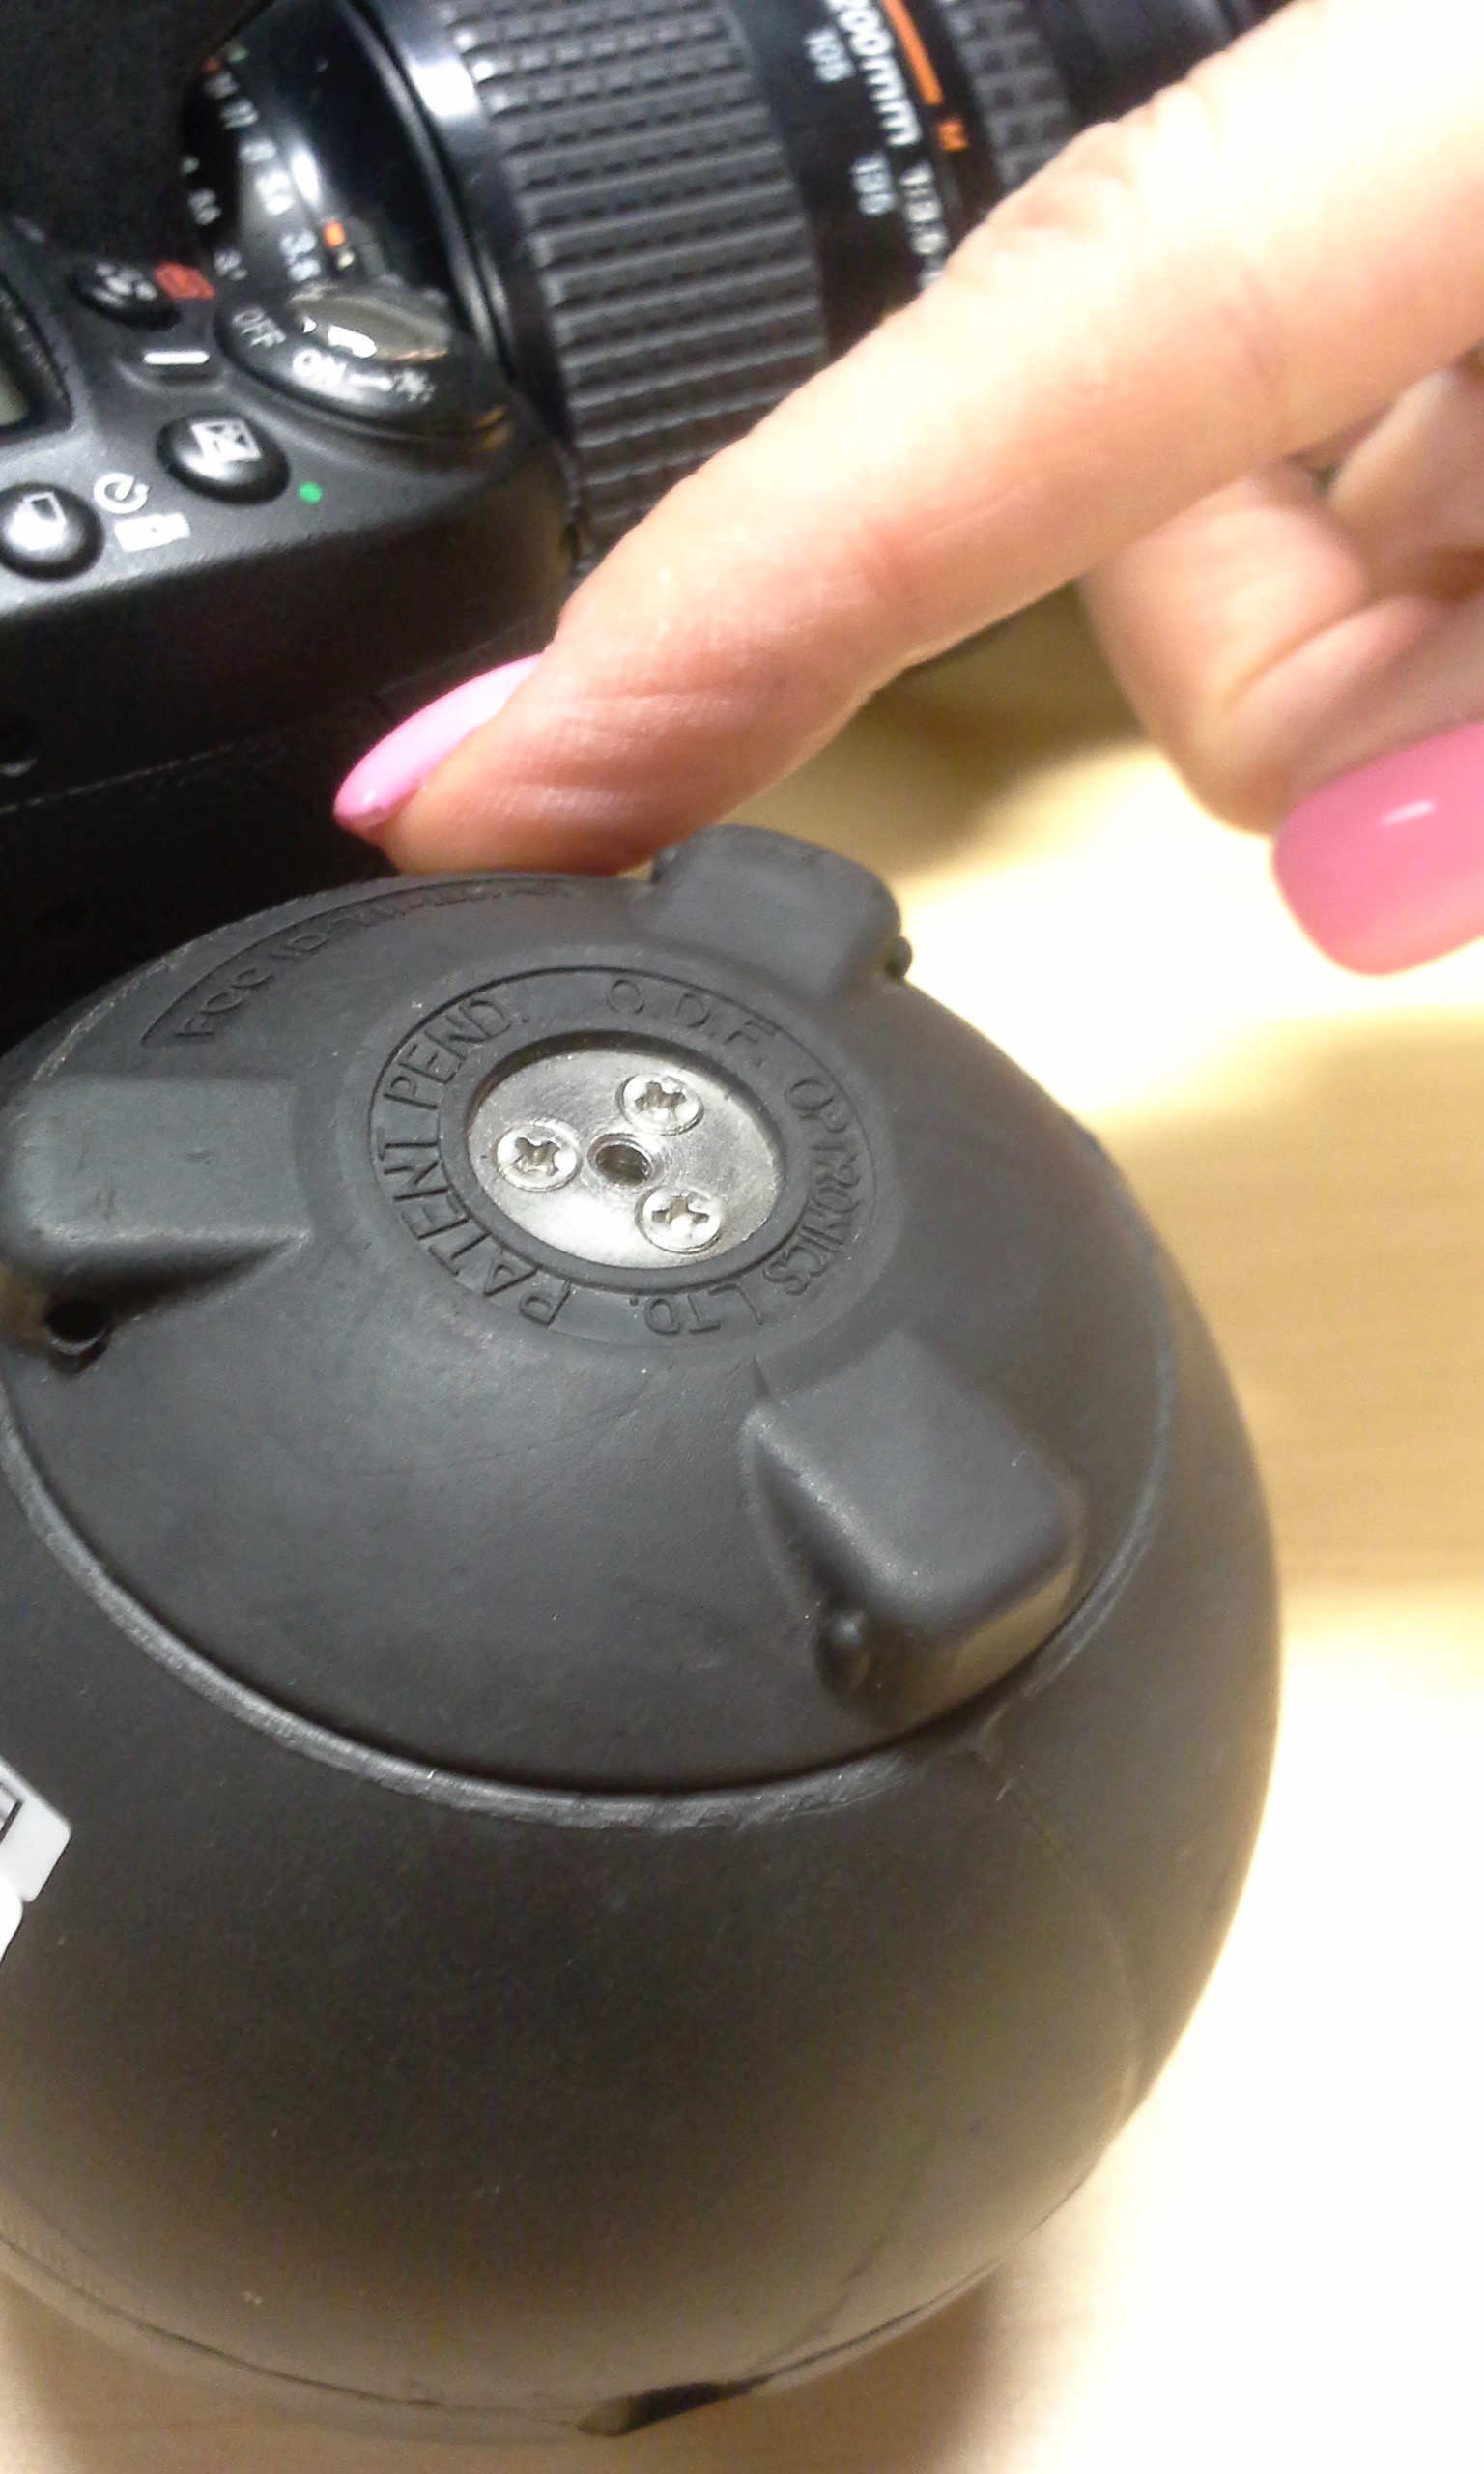
In order to show you the relative size, an Academy participant held it upright while I took the photo.


The sniper rifle is very loud (308 caliber) and if shot inside a house might cause permanent loss of hearing to those in the room, so handguns or other firearms are used, if needed at all.


Armored vehicles:  the teams wait in them while part of the team is working. Not all towns have them at a price tag of from $180K to $630K. Why the hefty cost? At the high end, the armored vehicles can withstand ammo assault from below and to the engine, are bulletproof through continued attack, and have the option of roof mounted gun turrets. The opening scene in Jamie Freveletti’s novel, “Blood Run,” gives a realistic portrayal of a substantially armored vehicle under attack.

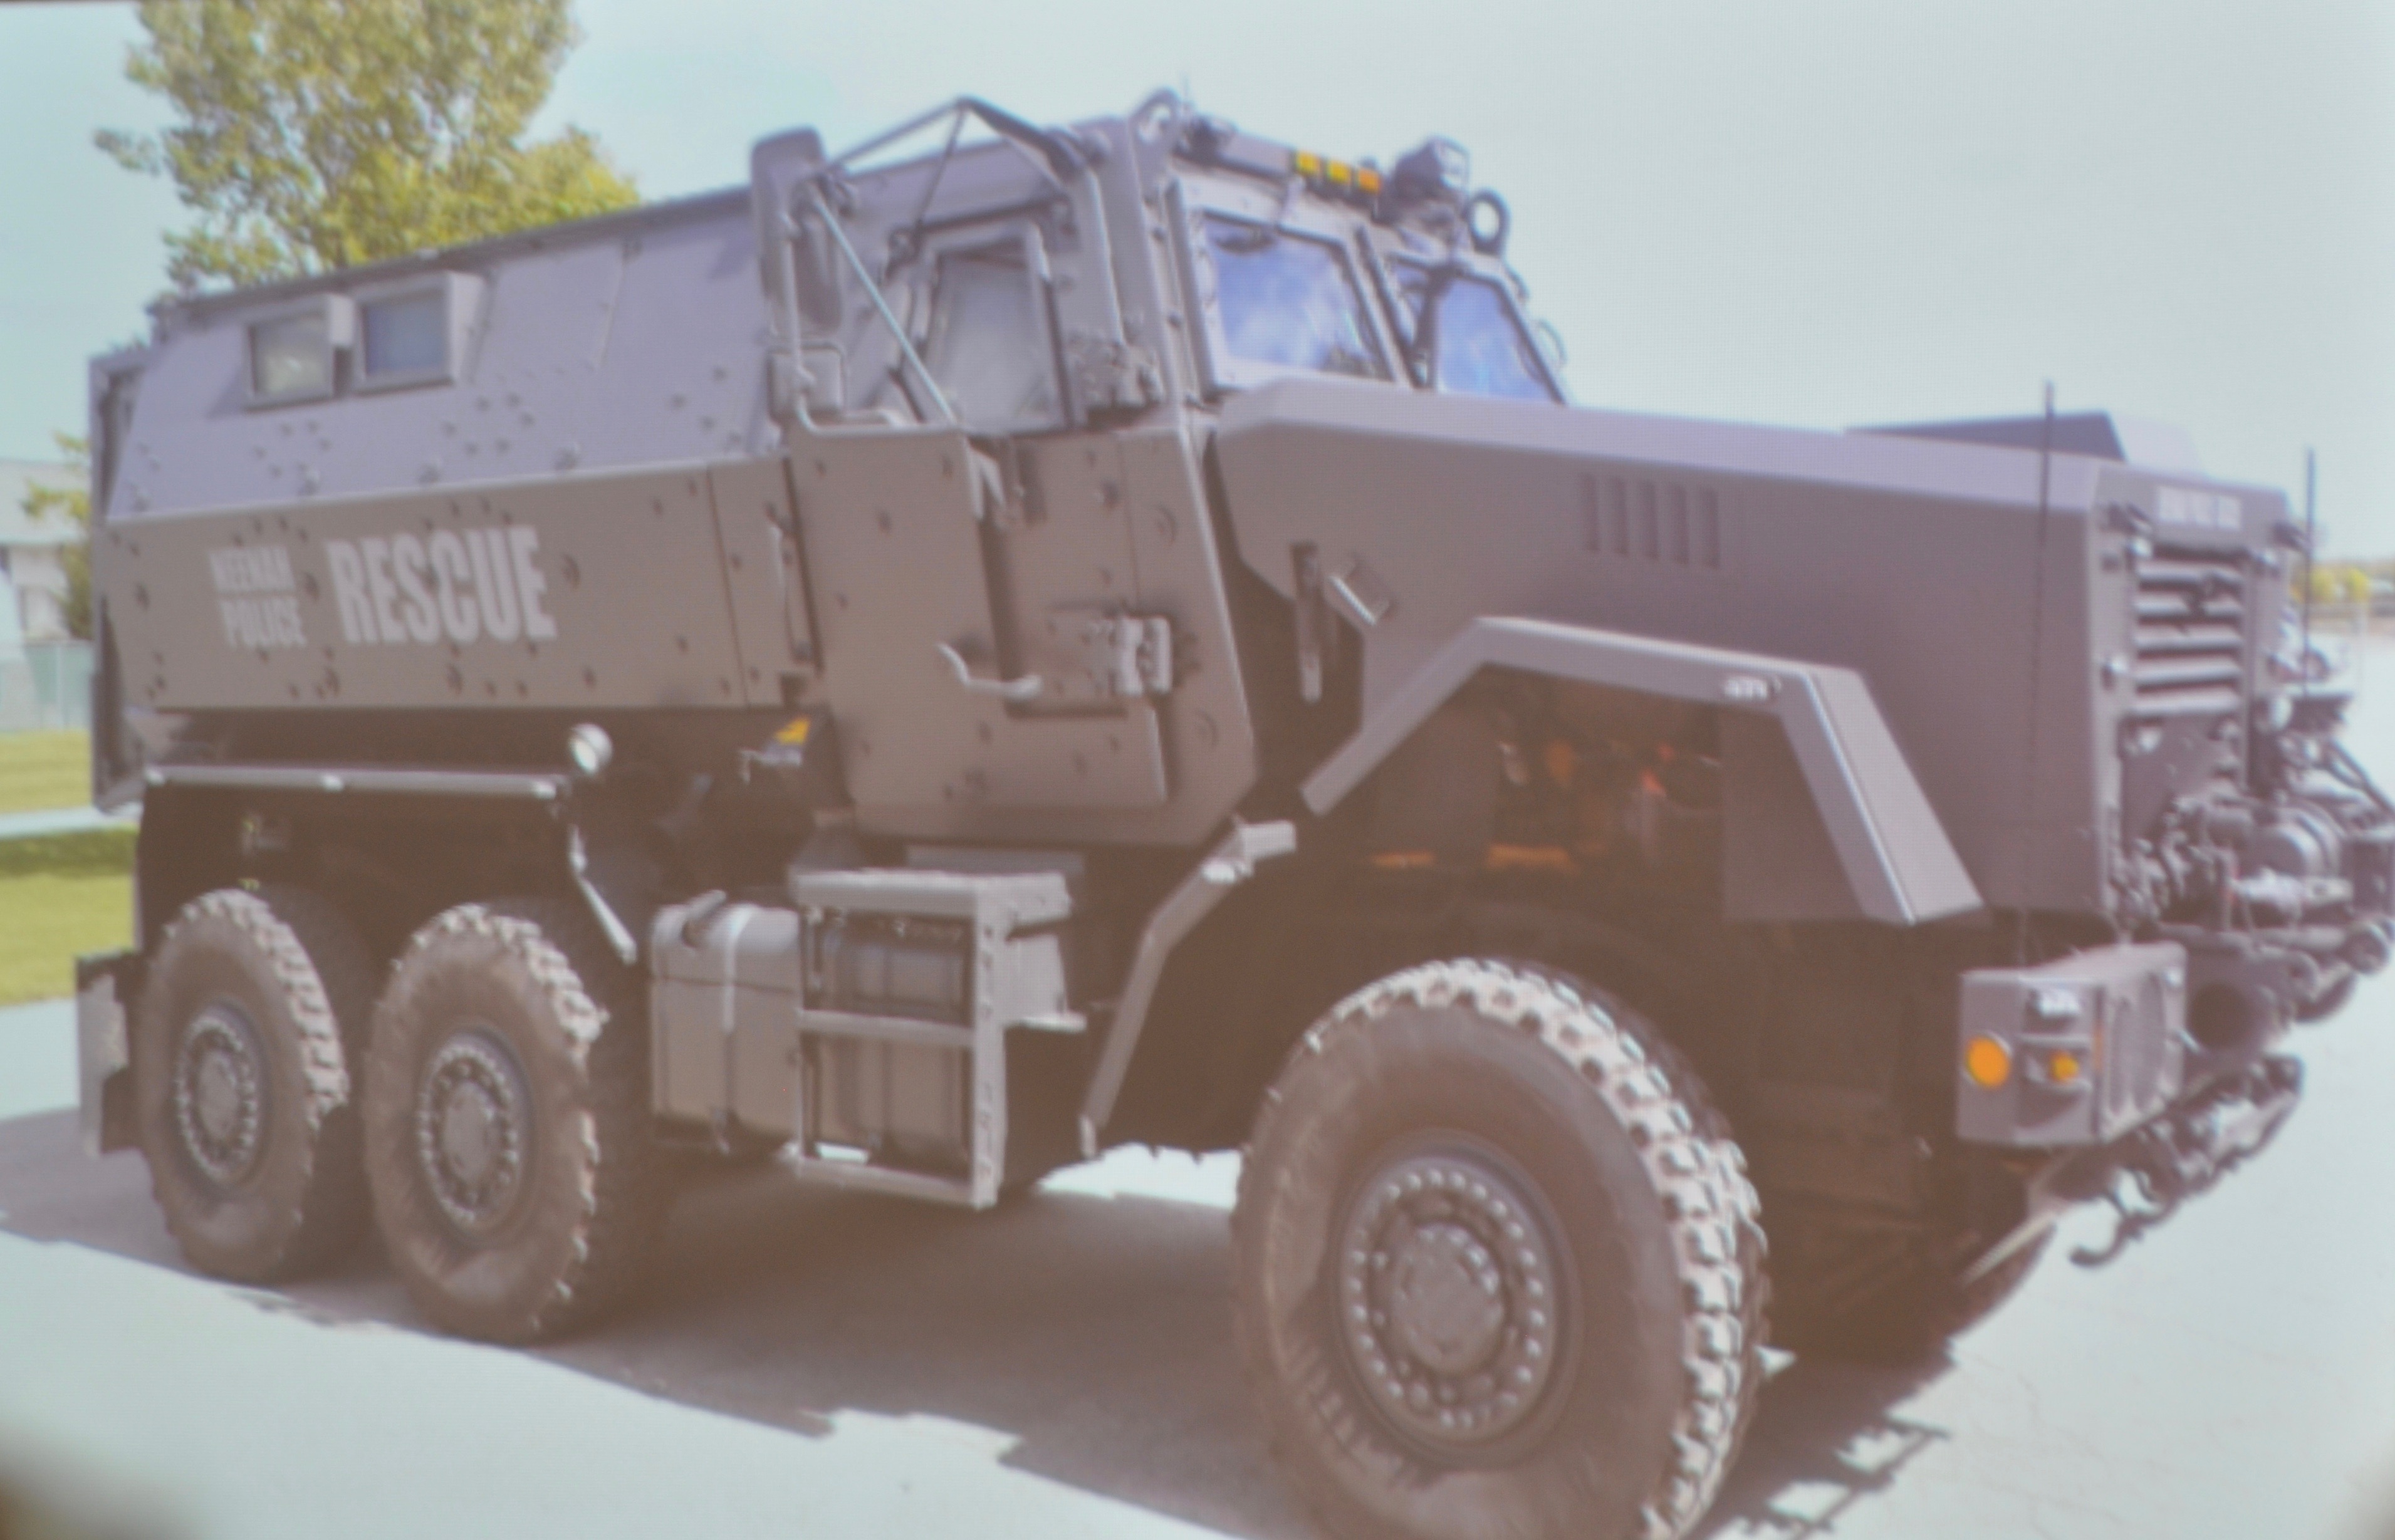
This armored vehicle is used by the Neenah, Wisconsin Police Department.


Curious about salaries for doing this dangerous and challenging job?


Nationwide average in the USA:   $59,475

Wichita Falls, TX average:  $55,164
North Carolina average:  $50,575


Thanks go to the Neenah Police Department members who shared their information and experiences at a Writers’ Police Academy held in Wisconsin.


Many thanks to Lee Lofland for organizing this outstanding annual event.


Additional information from:


https://policeandsecuritynews.com


https://www.ziprecruiter.com/Salaries/What-Is-the-Average-Swat-Team-Salary-by-State


http://www.wichitafallstx.gov/154/Special-Operations-Section


Photo credits:
All except armored truck: Patti Phillips.
Armored truck: Neenah, Wisconsin Police Department


Scroll to Top