KerriansKitchen

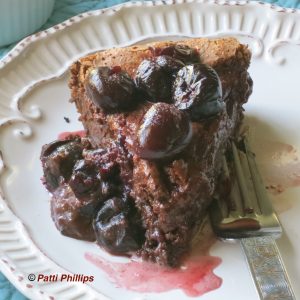
KNR, p. 236 “Almond Cherry Chocolate Torte”


We like chocolate cake and we also like brownies because of the denser consistency. But, if we wanted to have a gluten-free chocolate dessert, neither one of Sheila’s go-to recipes would quite work. Sheila played around with some ingredients for the flavor she wanted, and then we both taste-tested the results.


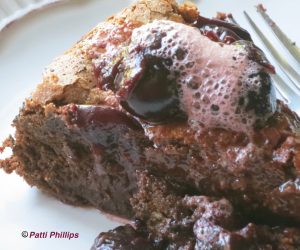
After we poured the cherry juice over the cherries on top of the chilled torte, the dessert was a lot like a mousse in texture. We ate it with and without the juice, with and without the foam, with and without the ice cream. We taste-tested our way through the entire dessert while the photos were taken. My tummy liked it all.


"Almond Cherry Chocolate Torte"
Author: 
Recipe type: Dessert
Cuisine: American
Prep time: 
Cook time: 
Total time: 
Serves: 6-8
 
Ingredients
  • 1 Tablespoon butter or margarine (grease cake pan)
  • 2 Tablespoons chocolate powder (unsweetened) (dust pan)
  • 12 oz. semi-sweet baking chocolate, broken into sections
  • 1/2 cup whipped butter
  • 6 egg yolks
  • 2 cups brown sugar
  • 3 Tablespoons brewed dark roast coffee
  • 2 teaspoons pure almond extract
  • 1 teaspoon sea salt
  • 5 egg whites
  • 3/4 cup fine almond flour
  • 4 cups frozen cherries, pitted
  • 1/4 cup water
Instructions
  1. Preheat oven to 325.
  2. Lightly grease sides and bottom of a springform cake pan with butter or margarine and dust with cocoa powder.
  3. Place 12 oz semi-sweet chocolate and whipped butter in the top of a double boiler, melt, and whisk together by hand until thoroughly mixed together. Remove from heat.
  4. Using large bowl, an electric mixer, and whisk attachment, whip egg yolks, 1 cup of the sugar, coffee, 1.5 teaspoons of the almond extract, and sea salt until thick and creamy.
  5. Add chocolate/butter mixture and continue to mix until blended.
  6. In a separate bowl and with a clean whisk, beat the egg whites until fluffy, about a minute. Slowly add 1/2 cup of the brown sugar and beat for another two minutes or until peaks form. (Should be stiff enough that a spoonful of the mixture will stay in the spoon when held upside down)
  7. Fold the almond flour into the egg whites, then carefully fold that mixture into the entire chocolate mix.
  8. Pour the batter evenly into the cake pan. There may be lots of bubbles in the mixture. If so, gently, but firmly bounce the pan on the counter once or twice to break up most of them.
  9. Place the pan on a cookie sheet in the middle of the oven and bake until the center puffs and cake edges pull away from the pan, about 40-45 minutes.
  10. Remove pan from oven, place on cooling rack for 40 minutes. As it cools, the center of the torte will collapse a little, creating a depression in which to put the cherries later.
  11. Place the pan on a flat cake plate/stand and remove the sides.
  12. Cover and chill in the refrigerator for at least two hours.
  13. Place cherries, water, 1/2 teaspoon almond extract, and remaining 1/2 cup sugar into a sauce pan and heat on medium heat until sugar melts – about two minutes. Stir.
  14. Place cherries and the resulting juice in a covered container in the refrigerator to soak and chill for two hours.
  15. When chilled, strain the cherries and save the juice.
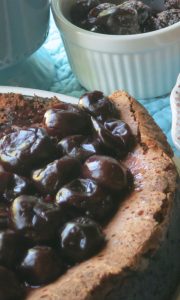
  16. Spread the cherries evenly in the depression on the top of the torte.
  17. Lovely with ice cream and the cherry juice poured on top.
Cherry Foam: 

If you’d like to make the foam shown in the photo below, use the electric mixer and the whisk attachment. Whisk the well-chilled cherry juice until foamy, about two minutes. This only works while the juice is cold, so work quickly.  Skim off the foam, about two tablespoons for each slice, and use as a light flavorful topping to the dessert. Or just pour the juice on top of the cherries. The flavor will be the same.


Enjoy!  🙂

Photos: by Patti Phillips

KNR, p. 236 “Almond Cherry Chocolate Torte” Read More »

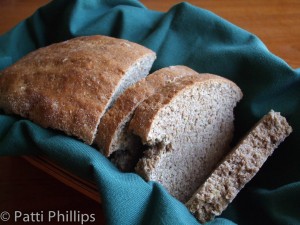
KNR, p. 139 “Irish Brown Bread”


Ireland is a fabulous place to visit from Spring right through early Fall. The country has plenty of top-notch scenery, challenging golf courses, stud farms, and castles galore. And, it has all that really great food. Sheila and I had loads of fun going from tea room to pub to restaurant, sampling traditional Irish dishes.


The one constant at lunch wherever we went was the dense brown bread. It varied slightly in taste with different bakers, but it was usually served with soup or at afternoon tea, with jam, butter or honey.


Of course, when we came back to the States, Sheila and I created our own version of the bread so that we could serve it on St. Patrick’s Day. Yes, it is on the table with the soda bread, giving our guests a chance to try both. To be clear, Sheila does the baking and I do the tasting and cleanup. We make a great team in the kitchen.  🙂 


5.0 from 1 reviews
"Irish Brown Bread"
Author: 
Recipe type: bread
Cuisine: Irish
Prep time: 
Cook time: 
Total time: 
Serves: 6-8
 
Ingredients
  • 1 cup unbleached all-purpose flour
  • 3 Tablespoons light brown sugar
  • 1 teaspoon baking powder
  • 1 teaspoon baking soda
  • 1 teaspoon sea salt
  • 2 Tablespoons cold butter
  • 2 ¾ cups stone ground whole wheat flour, plus additional Tablespoons if needed
  • ¼ cup regular or quick-cooking rolled oats
  • 1 ½ cups buttermilk
  • 4”x8” loaf pan
  • non-stick cooking spray
Instructions
  1. In a mixing bowl, blend all-purpose flour, brown sugar, baking soda, baking powder and sea salt.
  2. Cut in butter until mixture forms pea sized crumbs.
  3. Stir in whole wheat flour and oats.
  4. Add buttermilk, using bread hook if available. If mixture is sticky, add in more whole wheat flour, 1 Tablespoon at a time, just until the dough has a smooth, dry surface.
  5. Place dough ball on a lightly floured board and knead 6-7 times, shaping into a loaf.
  6. Spray 4”x8” loaf pan with non-stick spray and place dough in the pan.
  7. Bake at 400 until golden brown, about 45-50 minutes.
  8. Test for doneness with metal skewer.
  9. Remove from pan immediately and cool on rack.
  10. Let rest for 10-15 minutes before slicing.


Serve with butter, jam, or honey and enjoy!


*Photo by Patti Phillips


KNR, p. 139 “Irish Brown Bread” Read More »

KNR, p. 231 “Meatloaf…Comfort Food”


Damp, chilly days require stick-to-your-ribs, tasty comfort food. Sheila and I like to combine weekend shopping trips with lunch at the local all-comfort-food diner, but sometimes the winter weather keeps us home. During a couple of rough weeks with sleet, snow, and ice pounding the area, we needed a LOT of comfort food, but the roads were dicey and we elected to stay indoors. What did we do? We came up with our own version of the meatloaf we had enjoyed so often downtown. The owner wouldn’t share his secret recipe and laughed when we asked, but we did a bunch of taste-testing and we think we came pretty close. There were no bodies lying on the floor after we ate, so we must have gotten it right. Try it and see for yourself.  🙂


"Meatloaf...Comfort Food"
Author: 
Recipe type: Entree
Cuisine: American
Prep time: 
Cook time: 
Total time: 
Serves: 6-8
 
Ingredients
  • Meatloaf
  • 2 pounds ground beef, 90% or 93% lean preferred
  • 2 teaspoons onion powder
  • 2 heaping teaspoons minced garlic
  • 1 teaspoon sea salt (or to taste)
  • 1/2 cup + 1 Tablespoon condensed tomato soup
  • 1 large egg
  • 1/2 cup Progresso plain bread crumbs
  • 1 Tablespoon light brown sugar
  • 1 Tablespoon A-1 sauce
  • 1 teaspoon Gulden’s spicy brown mustard
  • Sauce
  • 1 cup condensed tomato soup
  • 2 Tablespoons light brown sugar
  • 2 Tablespoons A-1 sauce
  • 2 teaspoons Gulden’s spicy brown mustard
  • *1/2 teaspoon Canola oil for pan, not for meatloaf mixture
Instructions
  1. Preheat oven to 400.
  2. Lightly coat sides and bottom of a 9x5 loaf pan with Canola oil to reduce cleanup time.
  3. In a large bowl, thoroughly mix all meatloaf ingredients together.
  4. Press meatloaf mixture evenly in loaf pan, slightly mounded in the center, lengthwise
  5. Cover and bake for 30 minutes.
  6. Increase oven temperature to 425, uncover and bake for 30 minutes more.
  7. While meatloaf is baking, mix sauce ingredients together in small bowl and set aside.
  8. Meatloaf will shrink away from the edge of the pan when almost done.
  9. Remove from oven, spread 1/2 cup of the sauce on the top of the meatloaf and return to oven for 5 minutes more.
  10. Remove from oven and let stand for ten minutes.
  11. Heat the remaining sauce.
  12. Slice the meatloaf in half-inch slices and serve with sauce, greens beans, and mashed potatoes.

You can thank us later.  🙂


KNR, p. 231 “Meatloaf…Comfort Food” Read More »

Scroll to Top